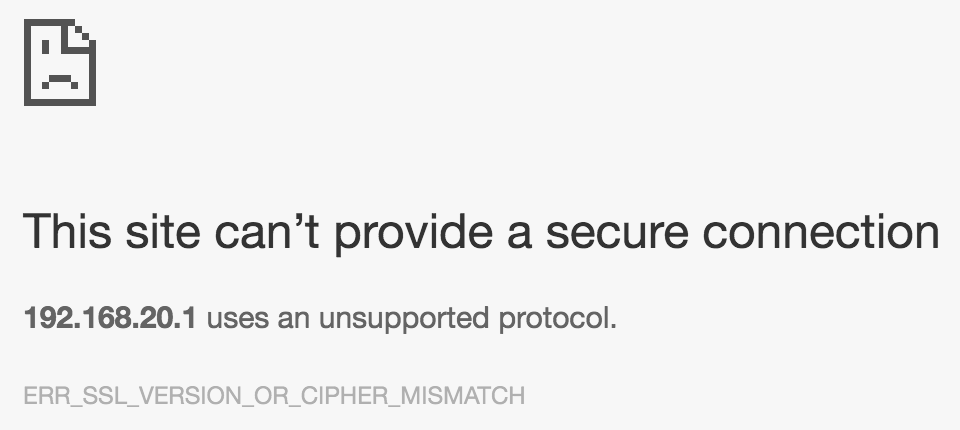
When connecting to SonicWall web interfaces through Chrome we began to receive the following error: ERR_SSL_VERSION_OR_CIPHER_MISMATCH.
This is because multiple vulnerabilities have been round in RC4 encryption recently which prompted the IETF to prohibit the use of the protocol.
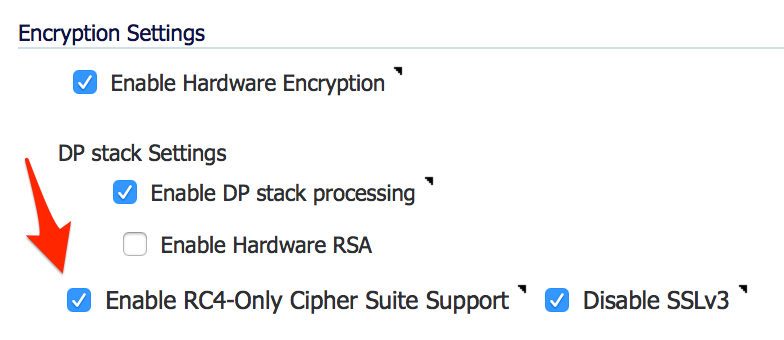
To get around the issue you can log in with Firefox and disable RC4 Encryption. You’ll need to access the hidden diagnostics page at https://sonicwall-ip/diag.html. Obviously replace sonicwall-ip with the actual IP of the device. Search for RC4 and you’ll see this:
Simply uncheck the “Enable RC4-Only Cipher Suite Support” checkbox and save the settings. Unfortunately this change will prompt and cause the SonicWall to reboot.
Once it comes back online you should now be able to use Chrome or any RC4 disable browser to access your SonicWall.
Upgrading is relatively easy because the OpenVPN Access Server is just a Debian package that runs on Ubuntu 14. Before upgrading OpenVPN it is a good idea to update the Ubuntu 14 server itself. You can use the standard:
iOS 8 changed the way apps register for push notifications. In order for your app to register for push notifications successfully on both iOS 7 and 8 you’ll need to check the version number and register differently.
if !Device.simulator?
  if Device.ios_version.start_with? "8"
    settings = UIUserNotificationSettings.settingsForTypes((UIRemoteNotificationTypeBadge | UIRemoteNotificationTypeSound |           UIRemoteNotificationTypeAlert), categories:nil)
    UIApplication.sharedApplication.registerUserNotificationSettings(settings)
    UIApplication.sharedApplication.registerForRemoteNotifications
  else
    UIApplication.sharedApplication.registerForRemoteNotificationTypes(UIRemoteNotificationTypeAlert | UIRemoteNotificationTypeBadge | UIRemoteNotificationTypeSound)
  end
end
Installing Dell OMSA on a ESXi server allows you to see more detailed information regarding the Dell hardware. It also allows you to perform operations such as specifying hot spares and rebuilding RAID arrays. After you install OMSA on the ESXi server you can install the OMSA web-based GUI on another Windows PC or Server in order to access OMSA.
The steps below will get OMSA up and running on VMWare ESXi 5.5. Be sure to download the version of the OMSA Offline Installation Bundle that corresponds to your version of ESXi.
Microsoft released their new remote desktop client for mac on October 17th, 2013. This comes after HLW Software Development (developer of iTap RDP for iOS, Mac and Android) announced they were discontinuing their products on October 8th.
This had us worried since we have multiple customers that use iTap on their Mac and iOS devices and we always have more customers that need to be set up. Since the iTap products were the only RDP apps for Mac and iOS that could work with a Terminal Server Gateway it didn’t us any other options. Luckily, Microsoft announced their new RDP clients, based on the iTap codebase, only 9 days after discontinuing the iTap products.
The new apps are not only a rebranding of the existing software, they contain a few enhancements. The greatest enhancement, for us and our clients anyway, is RemoteApp integration. That allows single apps to be run from a RDP session similar to what Parallels Coherence and VMWare Fusion Unity does for local VMs.
By clicking on Remote Resources you can enter the address of your RDWeb URL, your username and password and be presented with a list of published RemoteApps. This gets us one step closer to being able to recommend Apple devices to our clients without worrying about computability with Microsoft systems.
You can then access any public properties on the class that are exposed with attr_accessible or by using a custom getter and setter. If you have not specified any properties for your instance variables you can use the instance_variable_get helper to access the internal instance variables.
iOS 5 introduced the appearance API so that developers could customize the appearance of certain UI elements throughout the entire application without subclassing those controls.
For example, to change the appearance of a UINavigationBar you can set the appearance in the app delegate with the following code:
I had to use the hashrocket => instead of the new colon notation since using the colon notation resulted in the key constants being turned into symbols.
The .to_color helper is part of the BubbleWrap library. I’ll talk about that library in a separate post.
There is no way to specify a launch image directly in the Rakefile with the standard RubyMotion config options. The launch image is considered an advanced configuration option and can be set using the advanced plist settings technique which is detailed here: Advanced Info.plist Settings.
Basically you just use the app’s info_plist property to set any keys or values necessary in the Info.plist file that RubyMotion does not expose configuration options for.
I added this to my Rakefile to make it happen:
app.info_plist['UILaunchImageFile'] = 'launch'
Here, ‘launch’ is the base name for the images. This means that the filenames would look like this:
launch.png : 320 x 480px
launch@2x.png: 640 x 960px
launch-568h@2x.png : 640 x 1136px
Here is a quick way to add a user controller and views to a rails app that is using Devise for authentication. First, create the controller and views for the model which Devise created for you. You can do that with the scaffold_controller generator.
rails g scaffold_controller users
Now you’ll have the basic user CRUD abilities.
You’ll need to add a password_confirmation password field to the form if the generator didn’t do it for you. The main problem I’ve encountered is that you always have to type in the password and the confirmation when updating a user model. In order to prevent this you can override the password_required? method in the user model.
def password_required?
  (!password.blank? && !password_confirmation.blank?) || new_record?
end
Another nice thing I like to do is create a rake task to create a new user. This can be used on a new database to create a user to log in with. I created a file called auth.rake in lib/tasks.
namespace :auth  do
  desc "Create first database user"
  task :create_first_user => :environment do
    u = User.new
    u.full_name = "First User"
    u.email = "admin@example.com"
    u.password = "password"
    u.password_confirmation = "password"
    u.save

    puts "You can log in with email: '#{u.email}' and password: '#{u.password}'"
  end
end
I should begin by saying that we mainly fly domestically and when we do we fly southwest. That means that it is incredibly rare that we see any kind of departure or arrival delays. Somehow those planes are able to depart on time a high percentage of the time.
The story begins as we were leaving Los Angeles for Honolulu on an 8:45 am Delta flight. We were getting ready to start boarding when we were told that the flight was delated until 9:15am. We hung around and drank coffee while we waited. As 9:15am came around we were told that there was some kind of mechanical problem and they were looking for Part A. We kept waiting as they pushed the departure time back about a half hour at a time. After they installed and tested Part A they realized they needed Part B. After locating Part B they needed to wait for someone that was able to install Part B. This goes on and on all morning.
As noon came around we were notified that they had to switch out the staff at the desk since they were ready for lunch. Around that time we were also given food vouchers for $6 each which couldn’t even buy a sandwich at LAX.
After posting about this on twitter I was messaged by @DeltaAssist who I ended up direct messaging the entire time. They were giving me options for flying other airlines like a United flight leaving at 12:45pm. We never chose to go with another flight because our flight was always 30 – 45 minutes from departing. My girlfriend and I wanted to sit together and enjoy our private TVs, USB power and WiFi. Delta seems to have multiple agents using the @DeltaAssist account so responses were quick. The initial representative we were dealing with really tried to help out. Their messages ended with ^AK.
Finally some red coat guy showed up that looked all official and was talking on some red phone up at the desk. He finally told us that things looked promising and that they were moving the departure time to 1:15 but we would probably leave closer to 2pm. As 1:30pm came around the departure time jumped to 3pm with little or no explanation.
At that pont we got concerned but were still willing to wait for our nice Boing 767. We sat there patiently watching movies on our iPad and reading. We were also told by @DeltaAssist that we were “backed up” on the Delta flight at 5:45 pm so if this flight didn’t leave by then we could take that flight. 3pm rolled around and the flight was pushed back until 4pm.
As usual we kept waiting until 4pm came around and the departure time changed to 6:50 pm. After waiting there over 7 hours and thinking about how much vacation time we were missing we headed over the to the 5:45 flight. We walked from LAX terminal 6 to terminal 5 to get to the gate. We decided to talk to the gate agent to make sure our seats were available and she told us they weren’t and that the flight was sold out. When calling Delta customer service they told us that someone in Atlanta mistakenly cancelled our reservation on that flight. I was about to kill someone and my girlfriend was now crying. I messaged @DeltaAssist and my girlfriend called customer service and we were on the 6:45 American Airlines flight. Some new @DeltaAssist representative also told us that those seats we were promised were no longer available and that we were now on the American Flight.
This time we had to go to terminal 4 which meant going out through security and back in. Our seats were now on a Boeing 757 with no WiFi, USB power or TVs in each row. How is it possible that we pay for one flight, get delayed 10 hours, get on another flight missing most of the amenities, miss an entire day in Hawaii, don’t get to sit together and not get compensated? Somehow this was OK with Delta.
While waiting for the flight my girlfriend called customer service again to vent her frustration and to attempt to get her $300 change fee back. We tried to get down to Hawaii a little early for a company event they we having which we ended up missing due to the delays. They finally gave us our $300 back but we were still out what we paid for the flight.
We finally got into Honolulu around 10:30pm and made it to our resort, Disney’s Aulani Spa and Resort at 11:30pm. We had no idea when we left our hotel in LA at 6am that we would arrive at our destination almost 14 hours later.
From what Delta shared with, they spent most of the day either looking for parts or looking for the person to install the parts. If they just cancelled the flight and got those passengers on other flights that departed before noon I think everyone would be ok with it. The fact that they kept us on the hook by delaying the flight 30 minutes to an hour at a time is ridiculous. I read lots of articles in the news, INC magazine and various posts on Hacker News about how to properly handle customer service. Maybe Delta should start reading up.
I’m looking forward to sharing this story with anyone planning on flying Delta. This is something we won’t be forgetting anytime soon and will affect every travel decision we make from now on. The journey to your vacation destination should bring joy, not tears.